Add Zebra printer in Linux systems
Add a printer to the Linux system and prepare it for printing labels.
-
Start printer configuration utility
Press .
Figure 1: Start Printer application 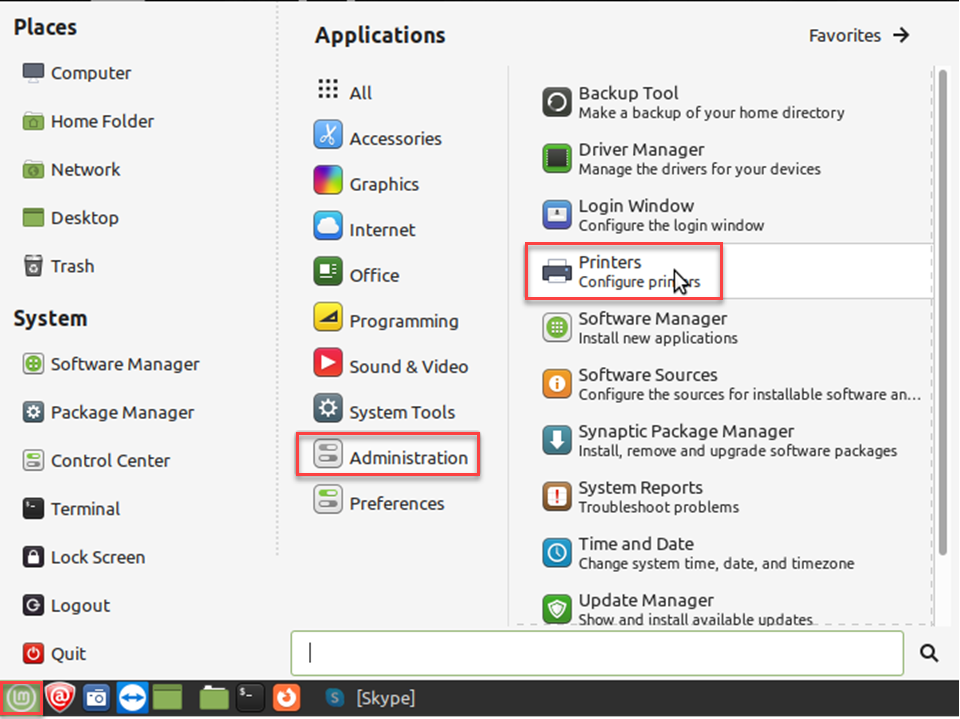
-
Add the printer
Press Add button.
Figure 2: Add new printer 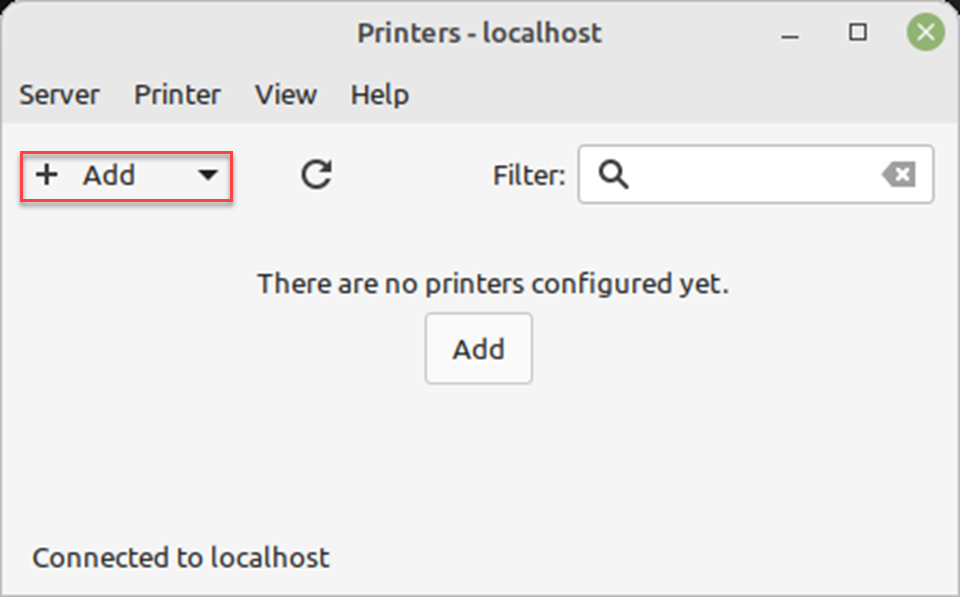
-
Select the device
Choose the Zebra printer in the devices list or enter the location of the network printer
Figure 3: Select Device 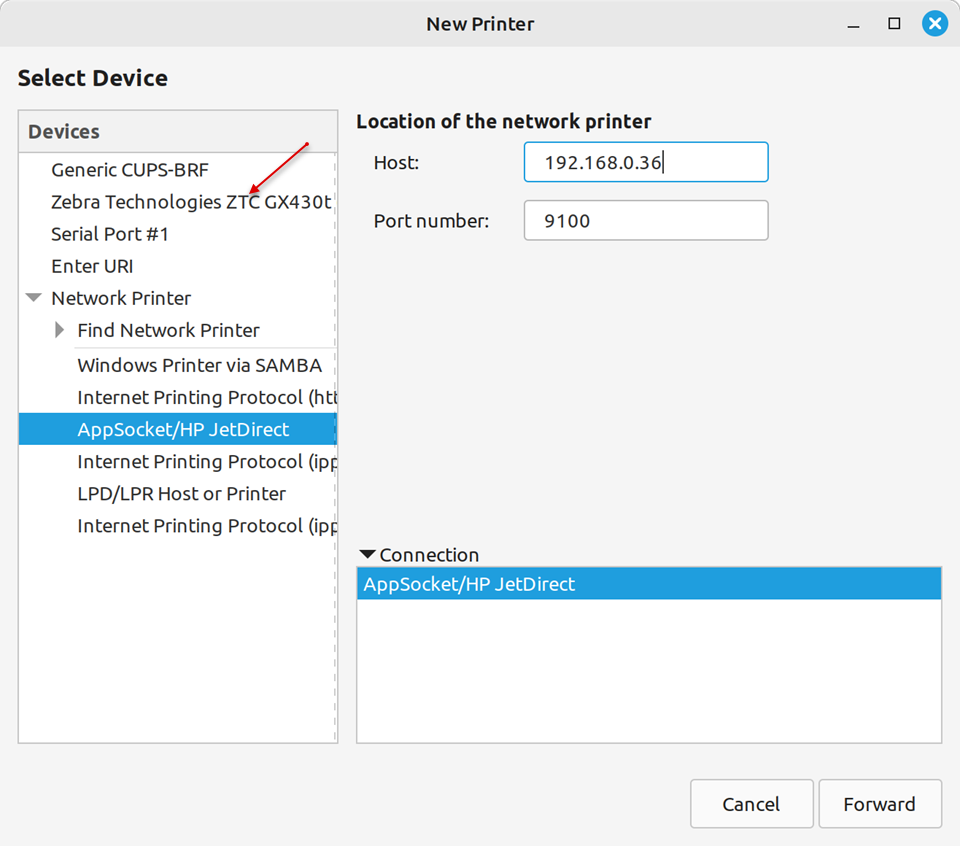
- For USB connection, the printer displays in the device list. Select the Zebra printer.
- For network connection, select and enter the network address in the Host field.
Press the Forward button for continue.
-
Choose the driver
Select the Zebra printer from the database and press the Forward button.
Figure 4: Select printer from database 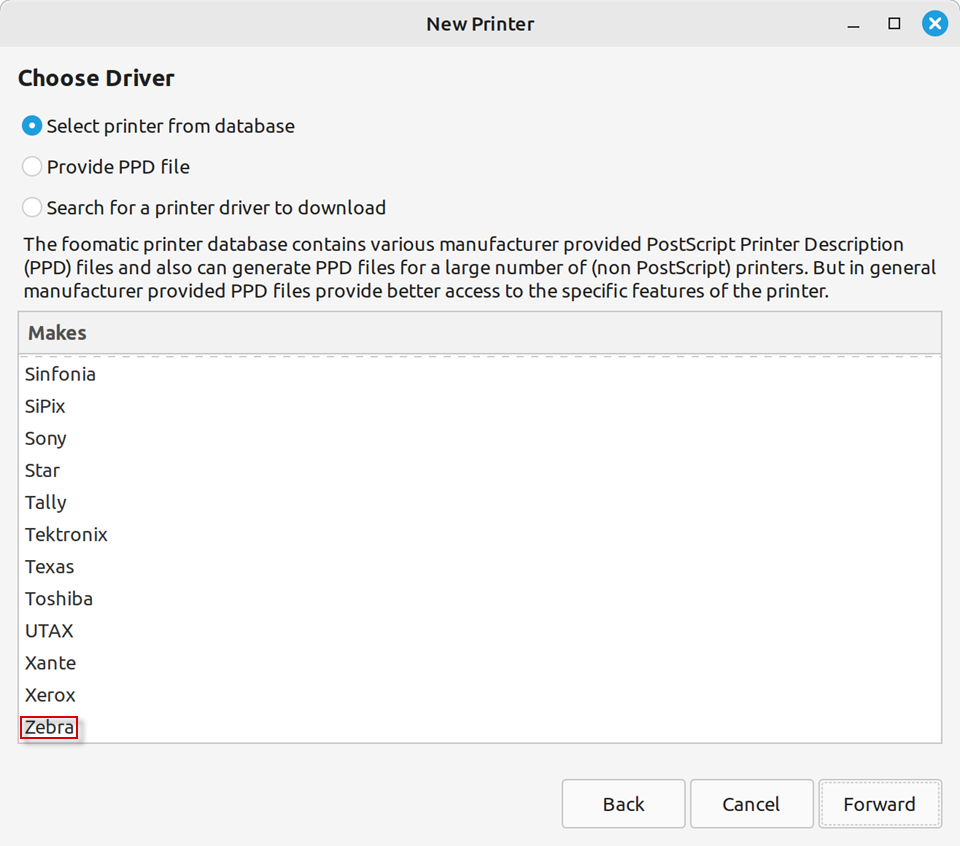
-
Choose the driver
Select the model of the printer driver and press theForward button.
Figure 5: Printer driver model 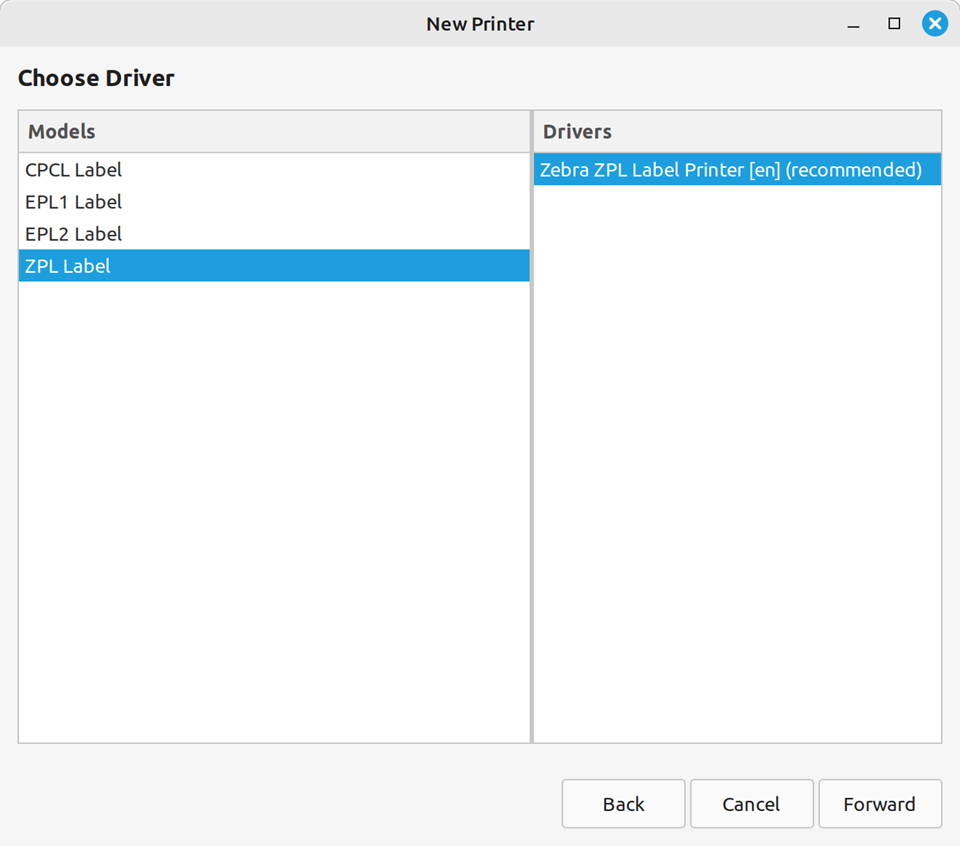
-
Edit printer description (optional)
If necessary, edit the printer description and press the Apply button.
Figure 6: Describe printer 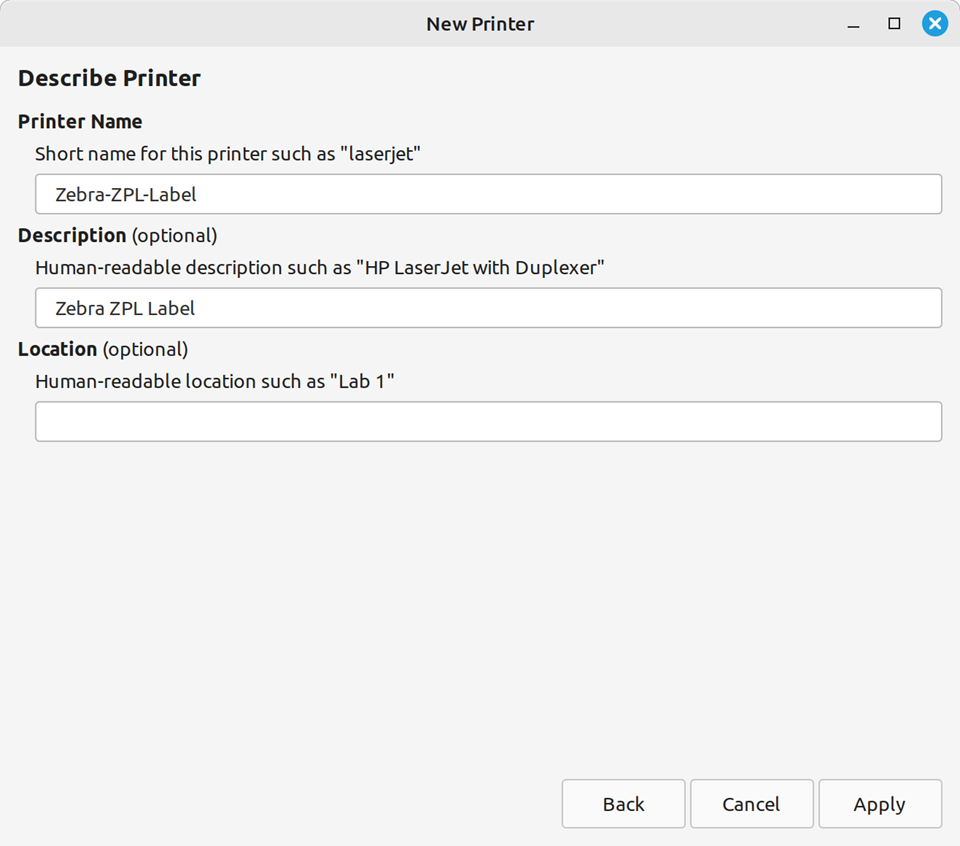
-
Edit printer properties
Double-click on the printer icon to open the printer properties.
Figure 7: Open the printer properties 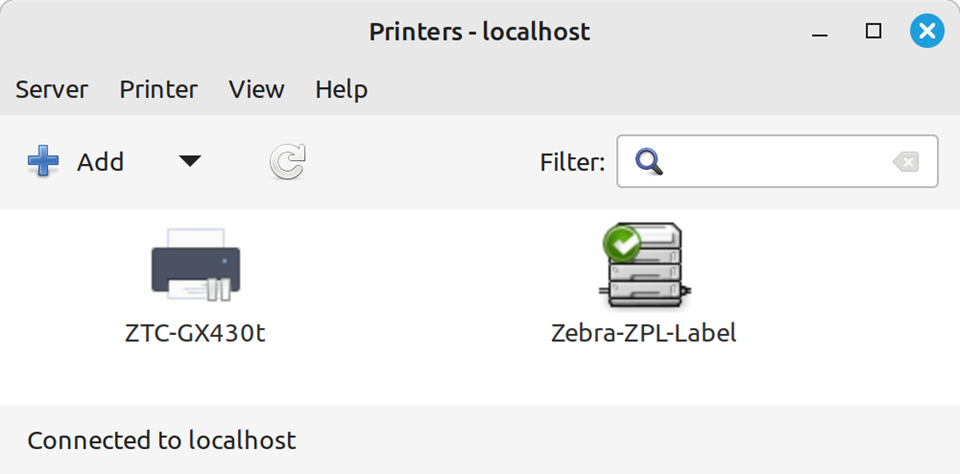
Specify the necessary printer attributes for printing as shown in the figure below and press the OK button to apply the changes.
Figure 8: Printer properties 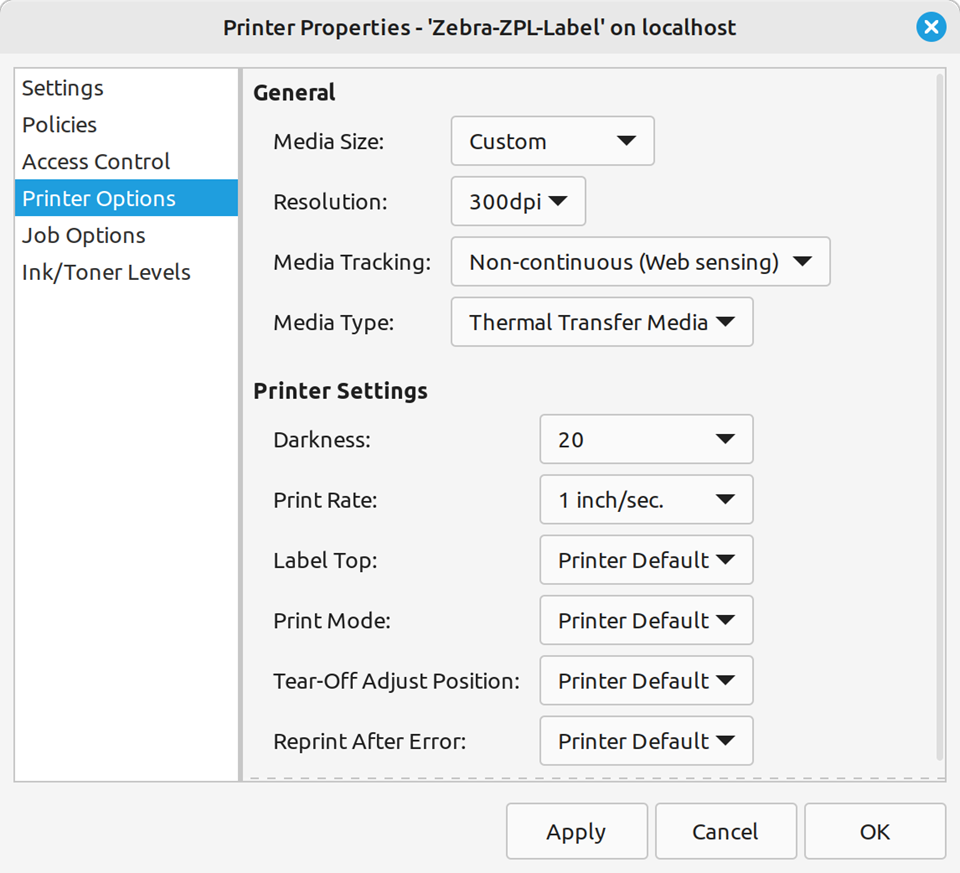
The Zebra printer is now installed and ready to use.