Set Disk Ports to Disk Bays
Mapping Disk Bays principal requester one-to-one mapping to data storage physical attachment, otherwise it remains as unassigned. There several techniques advised to fast and efficient way to map Disk Bay widgets to hardware objects.
After configuring your disk bay layout to match how the physical bays look on your hardware, you need to map the bays to the proper controller ports. Doing this will let disks start appearing in the application and appearing in the proper bay on the disk bay layout. The steps to easily do this is as follows:
- Choose one of the disk bays you want to map;
- Take a physical HDD/SSD and plug it into that bay;
- Right-click on the corresponding bay in Active@ KillDisk;
- Select the proper controller, then click on the port from the drop-down that shows a drive connected to it (look for a new name like “/sda”);
- Repeat for all the rest of the bays, plugging disks and mapping one at a time.
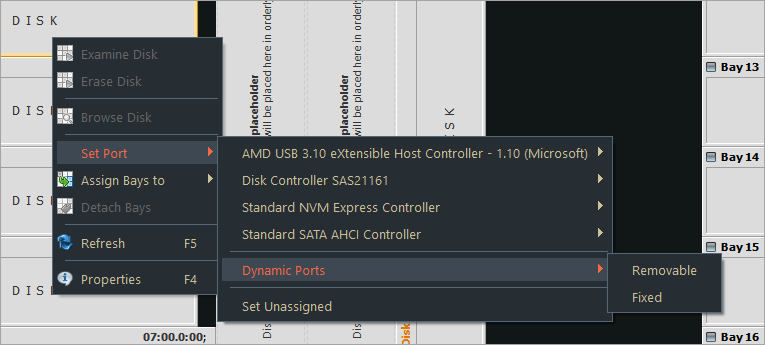
For some type of controllers static ports cannot be determined when new device appears, thus these disks cannot be statically linked to particular bays, for example, this happens for removable USB Disks which may have the same port number when inserted in different physical USB slots.
If you want to map a particular bay on the layout to be linked with a newly inserted disk which port is dynamically determined, from disk bay's context menu click then click type of disk you want to appear: Removable or Fixed.