Erase Certificates
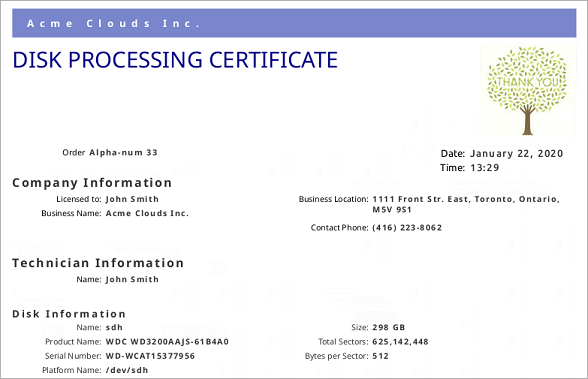
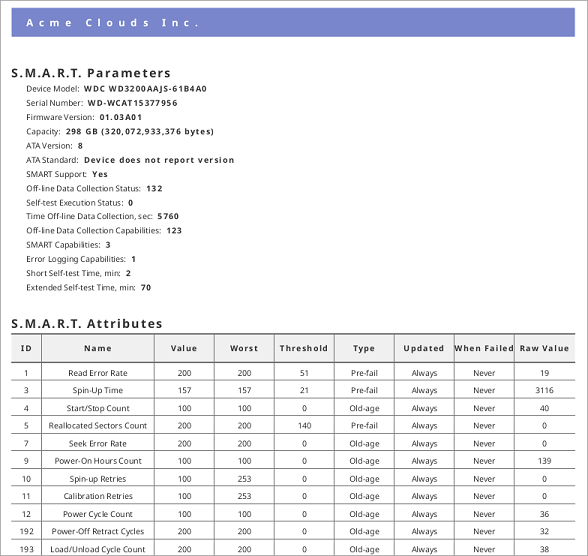
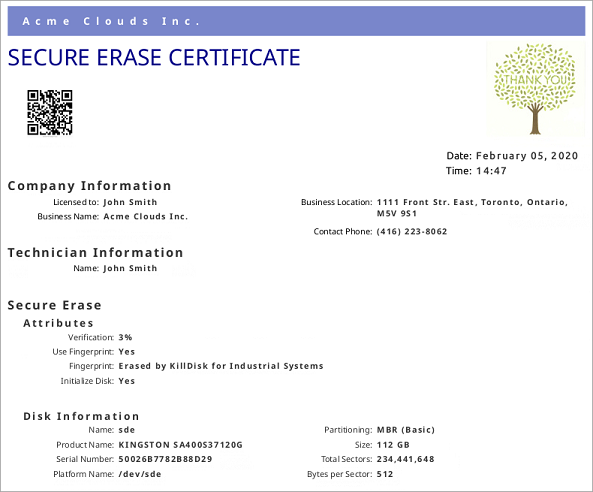
KillDisk provides PDF certificates upon the completion of Disk Erase, Secure Erase or Disk Wipe. These certificates can be customized to include company-specific information and hardware/procedure description. Configuring custom settings is described in the Certificate Preferences section of this guide.
Certificate Elements
- Company logo
- Company logo can be placed to the certificate instead of the default KillDisk's logo at the top right corner.
- Barcode
- A barcode in selected format with encoded tags and attributes for scanning using a barcode scanner.
- Company information
- Displays all company information provided in the preferences. The user in the sample above only provided a business name. But other company information may also be included in the certificate.
- Technician information
- Displays the technician information provided in the preferences. This section is for the name of the operator and any notes they may want to include in the certificate report.
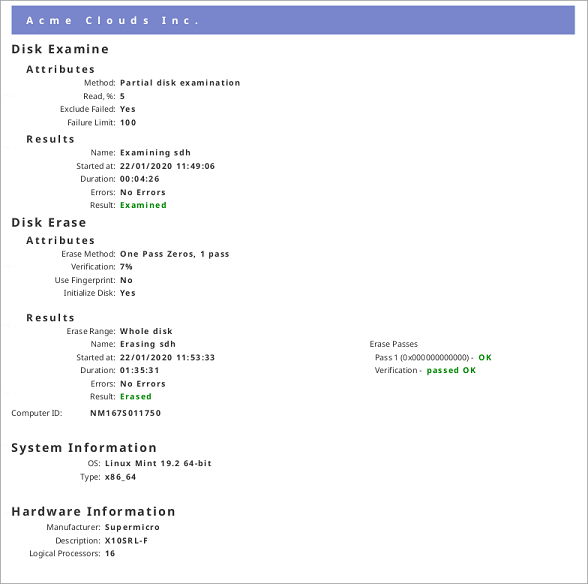
- Erasure results information
- Displays information pertaining to the erasure procedure conducted on the hard drive(s). Type of erasure algorithm, custom settings, date and time started and duration of the erasure are all listed here.
- Disk information
- Uniquely identifies the disk being erased. Includes information like Name, Serial Number, Size and Partitioning Scheme.
- System information
- Provides details on the system used to run KillDisk such as Operating System and Architecture type.
- Hardware information
- Provides details on the hardware used to run KillDisk such as Manufacturer, Number of Processors, etc.
The system information here only applies to the system running KillDisk, not the system that was erased by the application!
Storing Certificate to PDF
There are options for storing a certificate to file in PDF format as well as encrypting with passwords and digitally signing output PDFs. You can re-print stored to PDF certificates later on, as well as you can validate their integrity and validity.
- Certificate location
- Save erase certificate as a file in PDF format to the specific location.
- File name template
- Specify the template for the certificate file name. See the tags available in Appendix tags section.
- Encrypt with password
- If password field is not empty, output certificate (PDF file) will be encrypted and protected with specified password. This password needs to be typed in any PDF viewer the next time user opens a certificate for reviewing or printing.
- Sign certificate with digital signature
- Certificate file (PDF) can be signed with a default digital signature (supplied KillDisk.pfx certificate) or with your custom digital signature (.PFX file). Digital signature can be verified later on. If Adobe Reader successfully verified PDF document, it is guaranteed that its content hasn't been modified since issue.
- Display digital signature
- Digital signature can be displayed as an overlay text on the first page of certificate. After turning this option on, you can specify overlay text using tags (see tags section), its position on the first page, rectangle dimensions and text size.
Sample of Erase Certificate


Sample of Secure Erase Certificate
