KillDisk is an extremely powerful tool for secure disk erasure. Individual disks or batches of disks can be erased to any desired standard with just a few clicks. The process to achieve this is outlined in this section.
-
Observe erase process
If Disk examination options was selected then disk examination will started first. Depending on examination outcome at second stage - disk erase begins.
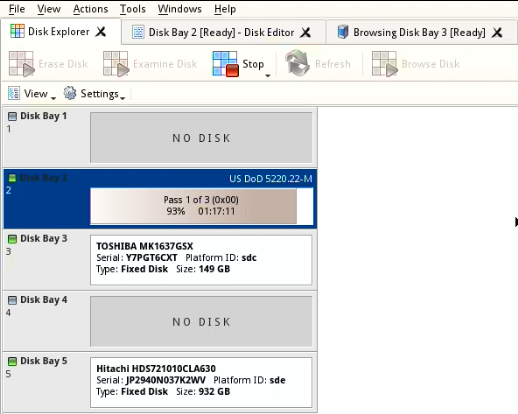
Once the Erase procedure begins, you will see the green progress bar turn red. At this point, the bay will show the erase method and progress. The progress bay here represents the percentage of data left to erase on the drive, with the corresponding percentage shown. As the procedure progresses, the percentage will decrease, and the red bar will get smaller.
The remaining time will also be seen and progress in the operation will be displayed, as shown below:
Figure: Disk erasure
If Disk copy options was selected then after erase the final stage of this task begins - clone data from source to all successfully erased disks.
When erasing completes you can review results, print Erase certificate, Erase labels for processed disks.
See: Processing summary