Note: To customize Boot Disk image file you need basic skills in Command Line Scripts writing.
To customize Active@ KillDisk Boot Disk WinPE image, for example to change a default Erase Method and add a Company
Logo:
Create custom KILLDISK.INI file using documented parameters (Application Settings)
Here is an example of an INI file which uses US DoD 5220.22-M (ECE) erase method with 10% verification,
stores logs, reports and certificates to X:\\ location (X: virtual drive is the only known drive with guaranteed
letter when boot disks starts), specifies Company Name and Logo Image file:
Create KillDisk start up script which uses Command Line parameters
Here is an example of an CMD file which enumerates all drive letters, searches KILLDISK.INI file in
User_Files folder, defines Drive Letter where Settings and Logo stored, copies Company Logo image file to known
location and starts KillDisk with custom KILLDISK.INI file:
@ECHO OFF
FOR %%i IN (c d e f g h i j k l m n o p q r s t u v w x y z) DO (IF EXIST %%i:\user_files\KILLDISK.INI ( SET CDROM=%%i:&& GOTO END ))
:END
copy %CDROM%\user_files\MyCompanyLogo.png X:\
KillDisk.exe -ip="%CDROM%\user_files"
Start Active@ Boot Disk Creator configure Boot Disk start up settings
Start Active@ Boot Disk Creator
Click Windows Start menu and launch Active@ Boot Disk Creator from KillDisk folder
Select a Target
Select a media for Boot Disk to be created on (CD/DVD/BD ROM, ISO image or USB drive) and click
Next
Select Windows-based Boot Disk
Make sure Windows-based Boot Disk check box is selected on a Target tab
Disable default application auto-start
Switch to System Boot Settings tab and select OFF in Default
Application Start option
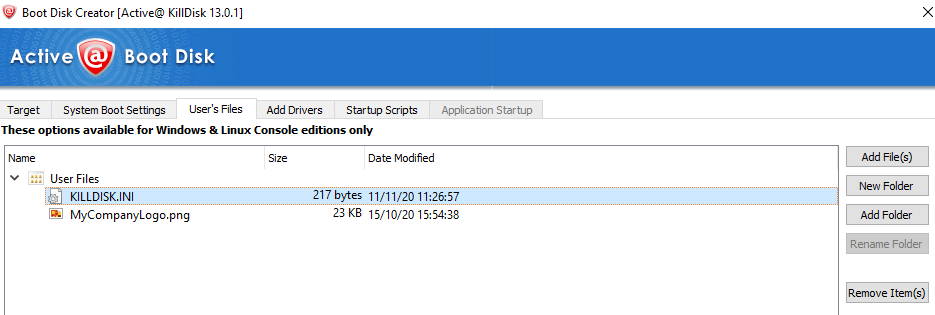
Add custom KILLDISK.INI file and Company Logo to User_Files folder
Switch to User's Files tab and click Add File(s) button to add your
custom settings file KILLDISK.INI and Company Logo Image file (JPG, PNG, BMP formats). After files
being added, application should look like:
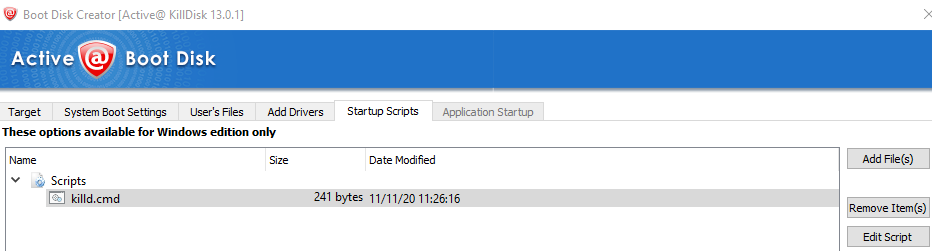
Add custom KillDisk start script to Startup Scripts
Switch to Startup Scripts tab and click Add File(s) button to add your
custom script (CMD file) where you launch KillDisk with custom Command Line parameters. After file
being added, application should look like: Click Next button to complete Boot Disk creation
Finalize Boot Disk creation
Click Create button to burn CD/DVD/BD, or store Boot Disk to ISO file, or write Boot Disk to
USB disk, depending on Target option selected on the first step
This document is available in PDF format, which requires Adobe® Acrobat® Reader (Free download):