Active
KillDisk

FAQ: Boot Disk Issues

How to erase hard drive? Windows7 logo   How to erase hard drive? Intel logo

Frequently Asked Questions (FAQ)

Boot Disk Issues


Can I automatically map a network drive when booting up into Active@ Boot Disk for Windows?

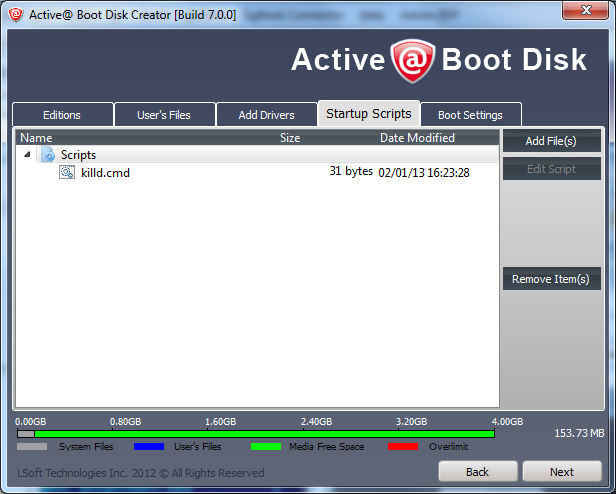
To map a drive, you would need to create a CMD script file and use the Windows "Net Use" command to map a drive, then add it into the scripts section of the Boot Disk Creator.

Usage and Sample of the NET USE command.

net use [devicename | *] [\\computername\sharename[\volume]] [password | *]] [/user:[domainname\]
net use o: \\LA\Storage password /USER:myAccount 


The Boot Disk Creator will not recognize the USB memory stick plugged into the system.

You can try plugging in the memory/flash stick into another port and try again. However some brands (such as new MicroCenter) may not be recognized. Please try a different brand of USB stick. A generic or no-name brand works best.


I would like to create a custom bootable image that automatically includes settings such as sending a certificate by email, including our logo in the certificate and other options. It seems I can do this in the installed version using the KillDisk.ini file. How can I do something similar for a CD created using Boot Disk Creator?

Read more

Here are steps to complete this:

  1. Create INI file having all required settings (certificate, email, paths, etc…). Use Active@ KillDisk to insert your settings and use the killdisk.ini file found in the program folder.

    How to erase hard drive: Bootdisk
  2. Add the INI file to User's Files folder in Boot Disk Creator.

    How to erase hard drive: Bootdisk Creator
  3. Create a script to be launched on Boot Disk startup. This script runs KillDisk with the required command line parameters. Example: killd.cmd (assumes that D: drive is CD-ROM or USB flash) killdisk.exe -ip="D:\user_files"
  4. Add the script file to Startup Scripts in the Boot Disk Creator.
  5. Turn OFF auto-start for Default Application in the Boot Settings section of the Boot Disk Creator.

    How to erase hard drive
  6. Turn ON Network (to be initialized on startup) in the Network tab of the Boot Settings section.

    How to erase hard drive: Bootdisk
  7. Finalize the process by creating the bootable CD/DVD or USB and boot from it.

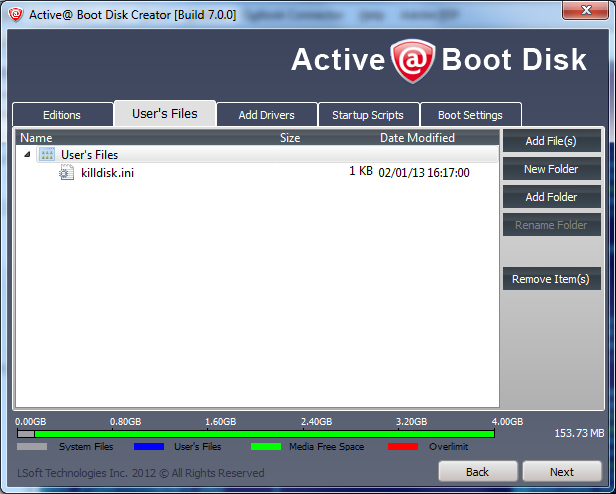
Example of killdisk.ini

[General]
logging=0
showCert=true
saveCert=false
initDevice=true
clearLog=false
ignoreErrors=false
skipConfirmation=false
retryAtt=2
certPath=
logPath=
logName=killdisk.log
wipeMethod=0
wipeVerification=false
wipeVerificationPercent=10
wipeUserPattern=Erased by Active@ KillDisk
wipeUserPasses=3
wipeUnusedCluster=true
wipeUnusedBlocks=false
wipeFileSlackSpace=false
killMethod=0
killVerification=false
killVerificationPercent=10
killUserPattern=Erased by Active@ KillDisk
killUserPasses=3
showLogo=true
logoFile=
shutDown=false
sendSMTP=true
toSMTP=username@domain.com
useDefaultAccount=true
authorizeSMTP=false
fromSMTP=
nameSMTP=
usernameSMTP=
passwordSMTP=
portSMTP=25
clientName=Some client
technicianName=Alexander
companyName=My company
companyAddress="7177 Danton Prom, Mississauga"
companyPhone=
logComments=
 

The Active@ Boot Disk bootable media is not booting up my system after I've selected the correct Boot Priority. It either sits at a blank screen or just tries to boot up from my hard drive. What can I do?

This issue may be related to the BIOS mode that is set on your computer. You will need to check your system BIOS settings to ensure your system is set to Legacy mode or that UEFI is disabled. Here is how you can check your BIOS settings.

At the moment of turning on your computer, you will see an option to enter SETUP. Depending on the manufacturer of your system, you can press the DEL key, the F2 key or another key that is listed on screen to access the system BIOS. If you are not sure, consult the User Guide that came with your computer or call the manufacturer's technical support for assistance.

Once in your system BIOS, look under the Boot menu to find an option that reads "UEFI/BIOS Boot Mode" or "UEFI Boot". In the case of "UEFI/BIOS Boot Mode" switch the mode from "UEFI" to "Legacy" mode.

If you see "UEFI Boot", switch the option from "Enabled" to "Disabled". Be sure to save your BIOS changes and exit to reboot your computer. You should now be able to boot up from Active@ Boot Disk.

IMPORTANT: Once you have completed your operation with the boot environment and reboot your system, remember to go back into the BIOS and switch the boot mode back to UEFI.

  How to load Active@ Boot Disk over the network via PXE environment? New!

Read more

There are several steps required, configuring WinPE WIM, Boot Manager and PXE Server .

For the configuration steps, let's assume that inserted Active@ Boot Disk has a D: letter in our configuration environment.

Step 1: Copy WinPE Source Files onto PXE Server
  • Map a network connection to the root TFTP directory on the PXE/TFTP server (let’s assume it has a F: letter) and create there a \Boot folder (full name F:\Boot)
  • Copy the bootable Windows PE image (D:\SOURCES\BOOT.WIM) to the F:\Boot folder (on PXE/TFTP server)
  • Copy the BOOT.SDI file from D:\BOOT folder of inserted Active@ Boot Disk to the F:\Boot folder (on PXE/TFTP server)
  • Copy the BCD file from D:\BOOT folder of inserted Active@ Boot Disk to the F:\Boot folder (on PXE/TFTP server)
Step 2: Configure custom boot configuration (optional)

In case if default boot configuration supplied with Active@ Boot Disk (stored in file BCD) does not work for you, you can configure your custom boot configuration:

  • On a Windows 7 computer or in a Windows PE environment, create a BCD store by using the BCDEdit tool
  • Create the RAMDISK setting, BOOTMGR and OSLoader settings for the Windows PE image
  • Copy the BCD file to the F:\Boot folder (on PXE/TFTP server)
Step 3: Deployment process
  • Configure your PXE/TFTP server to point PXE clients to download Wdsnbp.com
  • A client is directed (by using DHCP Options or the PXE Server response) to download Wdsnbp.com
  • Wdsnbp.com validates the DHCP/PXE response packet and proceeds to download PXEBoot.com
  • PXEBoot.com downloads Bootmgr.exe and the BCD store. The BCD store must reside in a \Boot directory in the TFTP root folder. Additionally, the BCD store must be called BCD
  • Bootmgr.exe reads the BCD operating system entries and downloads Boot.sdi and the Windows PE image
  • Bootmgr.exe begins booting Windows PE by running Winload.exe within the Windows PE image

For more detailed instructions, read Microsoft TechNet official documentation

  We are using a WinPE environment that is booted into via PXE from a Windows Deployment Server. I am wondering if there is a way for us to copy registry information and files into the WIM file that we boot from so the applications are already installed and registered? Or will I need to script the installation and registration to occur each time we boot into WinPE? New!

Read more

Customizing WIM is a complex task, however it can be done. To accomplish this, run the following: (Requires Microsoft's Windows AIK and done from a command prompt)

  1. Mount WIM:
    Dism /Mount-Wim /WimFile:D:\ABoot\iso\sources\boot.wim /index:1 /MountDir:D:\!
  2. Attach Registry from a file to your local registry, add your values, unload registry:
    reg load HKLM\my D:\!\windows\system32\config\software
    reg add "HKLM\my\Microsoft\Windows NT\CurrentVersion\Fonts" /v "Courier New (TrueType)" /t REG_SZ /d cour.ttf
    reg unload HKLM\my
  3. Unmount WIM:
    Dism /unmount-Wim /MountDir:d:\! /Commit

Here is the link to access the Microsoft Windows AIK and documentation

An alternate method is to add a script in to the Boot Disk Creator while preparing bootable media. The script is then automatically launched when WinPE is loading. Here is a link with further details: http://boot-disk.com/booting_disk_drivers.htm.


Why does the computer reboot after 72 hours after running anything from within Boot Disk?

Windows PE reboots after 72 hours of continuous running. This is by design and can not be changed.

For more information, please refer to the Microsoft's MSDN article: Benefits and Limitations of Windows PE


How can I set my computer to boot from a floppy, CD-ROM or USB flash stick?

The system BIOS (system configuration) provides the option for setting the BOOT PRIORITY (start-up sequence). You may need to change the BOOT PRIORITY to specify the device you would like to start from first. Depending on the manufacturer of your system, you can press the DEL key, the F2 key or the F12 key the moment after turning on the computer's power. Some systems allow you to change the BOOT PRIORITY on power-up simply by holding down the F key for floppy or the C key for the CD-ROM device. If you are not sure, consult the User Guide that came with your computer or call the manufacturer's technical support for assistance.

ADDENDUM: If you are not able to switch from UEFI mode or noticed that you cannot boot into the boot environment, there you will need to also look for an additional option in the BIOS called Secure Boot. Check your BIOS for a SECURITY section and disable the SECURE BOOT option.


Why won't my WMI based scripts work in Active@ Boot Disk when they run just fine in normal windows boots?

Active@ Boot Disk uses a WinPE environment to boot from and use as an operating system. This environment currently does not support all WMI commands, so you are using commands that WinPE itself does not support.

This document is available in PDF format, which requires Adobe® Acrobat® Reader
(Free download):

USER'S GUIDE
Size: 714 KB

USER'S GUIDE (Console)
Size: 683 KB

KillDisk Datasheet
Size: 2,44 MB

Data Recovery

Data Utility

Data Security

Data Backup

CD/DVD Tools